
 Sales:
 Sales:
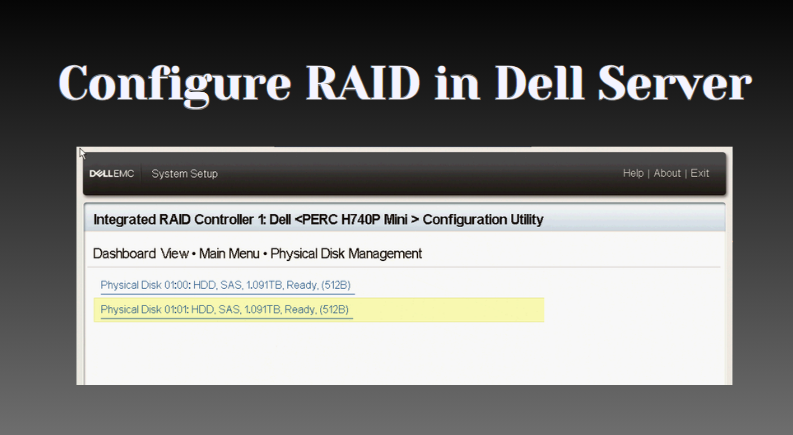
Configuring RAID on a Dell PowerEdge server is a straightforward process that can be effortlessly accomplished using the Dell PowerEdge RAID Controller (PERC) or the integrated Dell PERC (iDRAC) with Lifecycle Controller. Here’s a user-friendly guide to help you navigate the configuration process:
Step 1: Accessing the RAID Configuration Utility.
-
Commence by restarting or powering on your Dell PowerEdge server. (Free VPS Server)
-
Watchfully observe the boot process for a prompt that invites you to access the RAID configuration utility. This prompt may vary based on the server model, but typically resembles “Press + for RAID configuration.”
-
Promptly press the designated key combination to gain access to the RAID configuration utility.
Step 2: Crafting Your RAID Configuration.
-
Upon entering the RAID configuration utility, you’ll be empowered to create, modify, or eliminate RAID arrays with ease.
-
The precise steps for configuring RAID vary according to the RAID controller and the RAID level you intend to implement.
-
Common RAID levels include RAID 0 (striping), RAID 1 (mirroring), RAID 5 (striping with parity), RAID 10 (striping and mirroring), and more.
Step 3: Establishing a New RAID Array.
-
Select the option to create a new RAID array. (best dedicated server hosting)
-
Choose the desired RAID level, select the drives you wish to include in the array, and configure any additional settings (such as stripe size or cache policy).
Step 4: Modifying an Existing RAID Array.
-
Select the option to manage an existing RAID array.
-
You can add or remove drives from the array, alter the RAID level, or adjust other settings to suit your needs.
Step 5: Preserving Your Configuration.
-
Once you have meticulously crafted your RAID configuration, it’s crucial to save the changes.
-
This typically involves confirming the configuration modifications and then restarting the server.
Step 6: Initializing the RAID Array. (Best Web Hosting Provider)
-
After rebooting, you may need to initialize the RAID array.
-
This process prepares the array to seamlessly integrate with your operating system.
-
While this step is usually automated, it may occasionally require manual intervention depending on the RAID controller.
Step 7: Installing the Operating System.
-
Having configured your RAID array, you can now proceed with installing your chosen operating system.
-
During this process, you may need to load the RAID controller drivers if the operating system does not automatically detect your meticulously configured RAID array. (dedicated server hosting)
By following these succinct steps, you can effortlessly accomplish RAID configuration on your Dell PowerEdge server, enhancing the reliability, performance, and durability of your storage infrastructure.